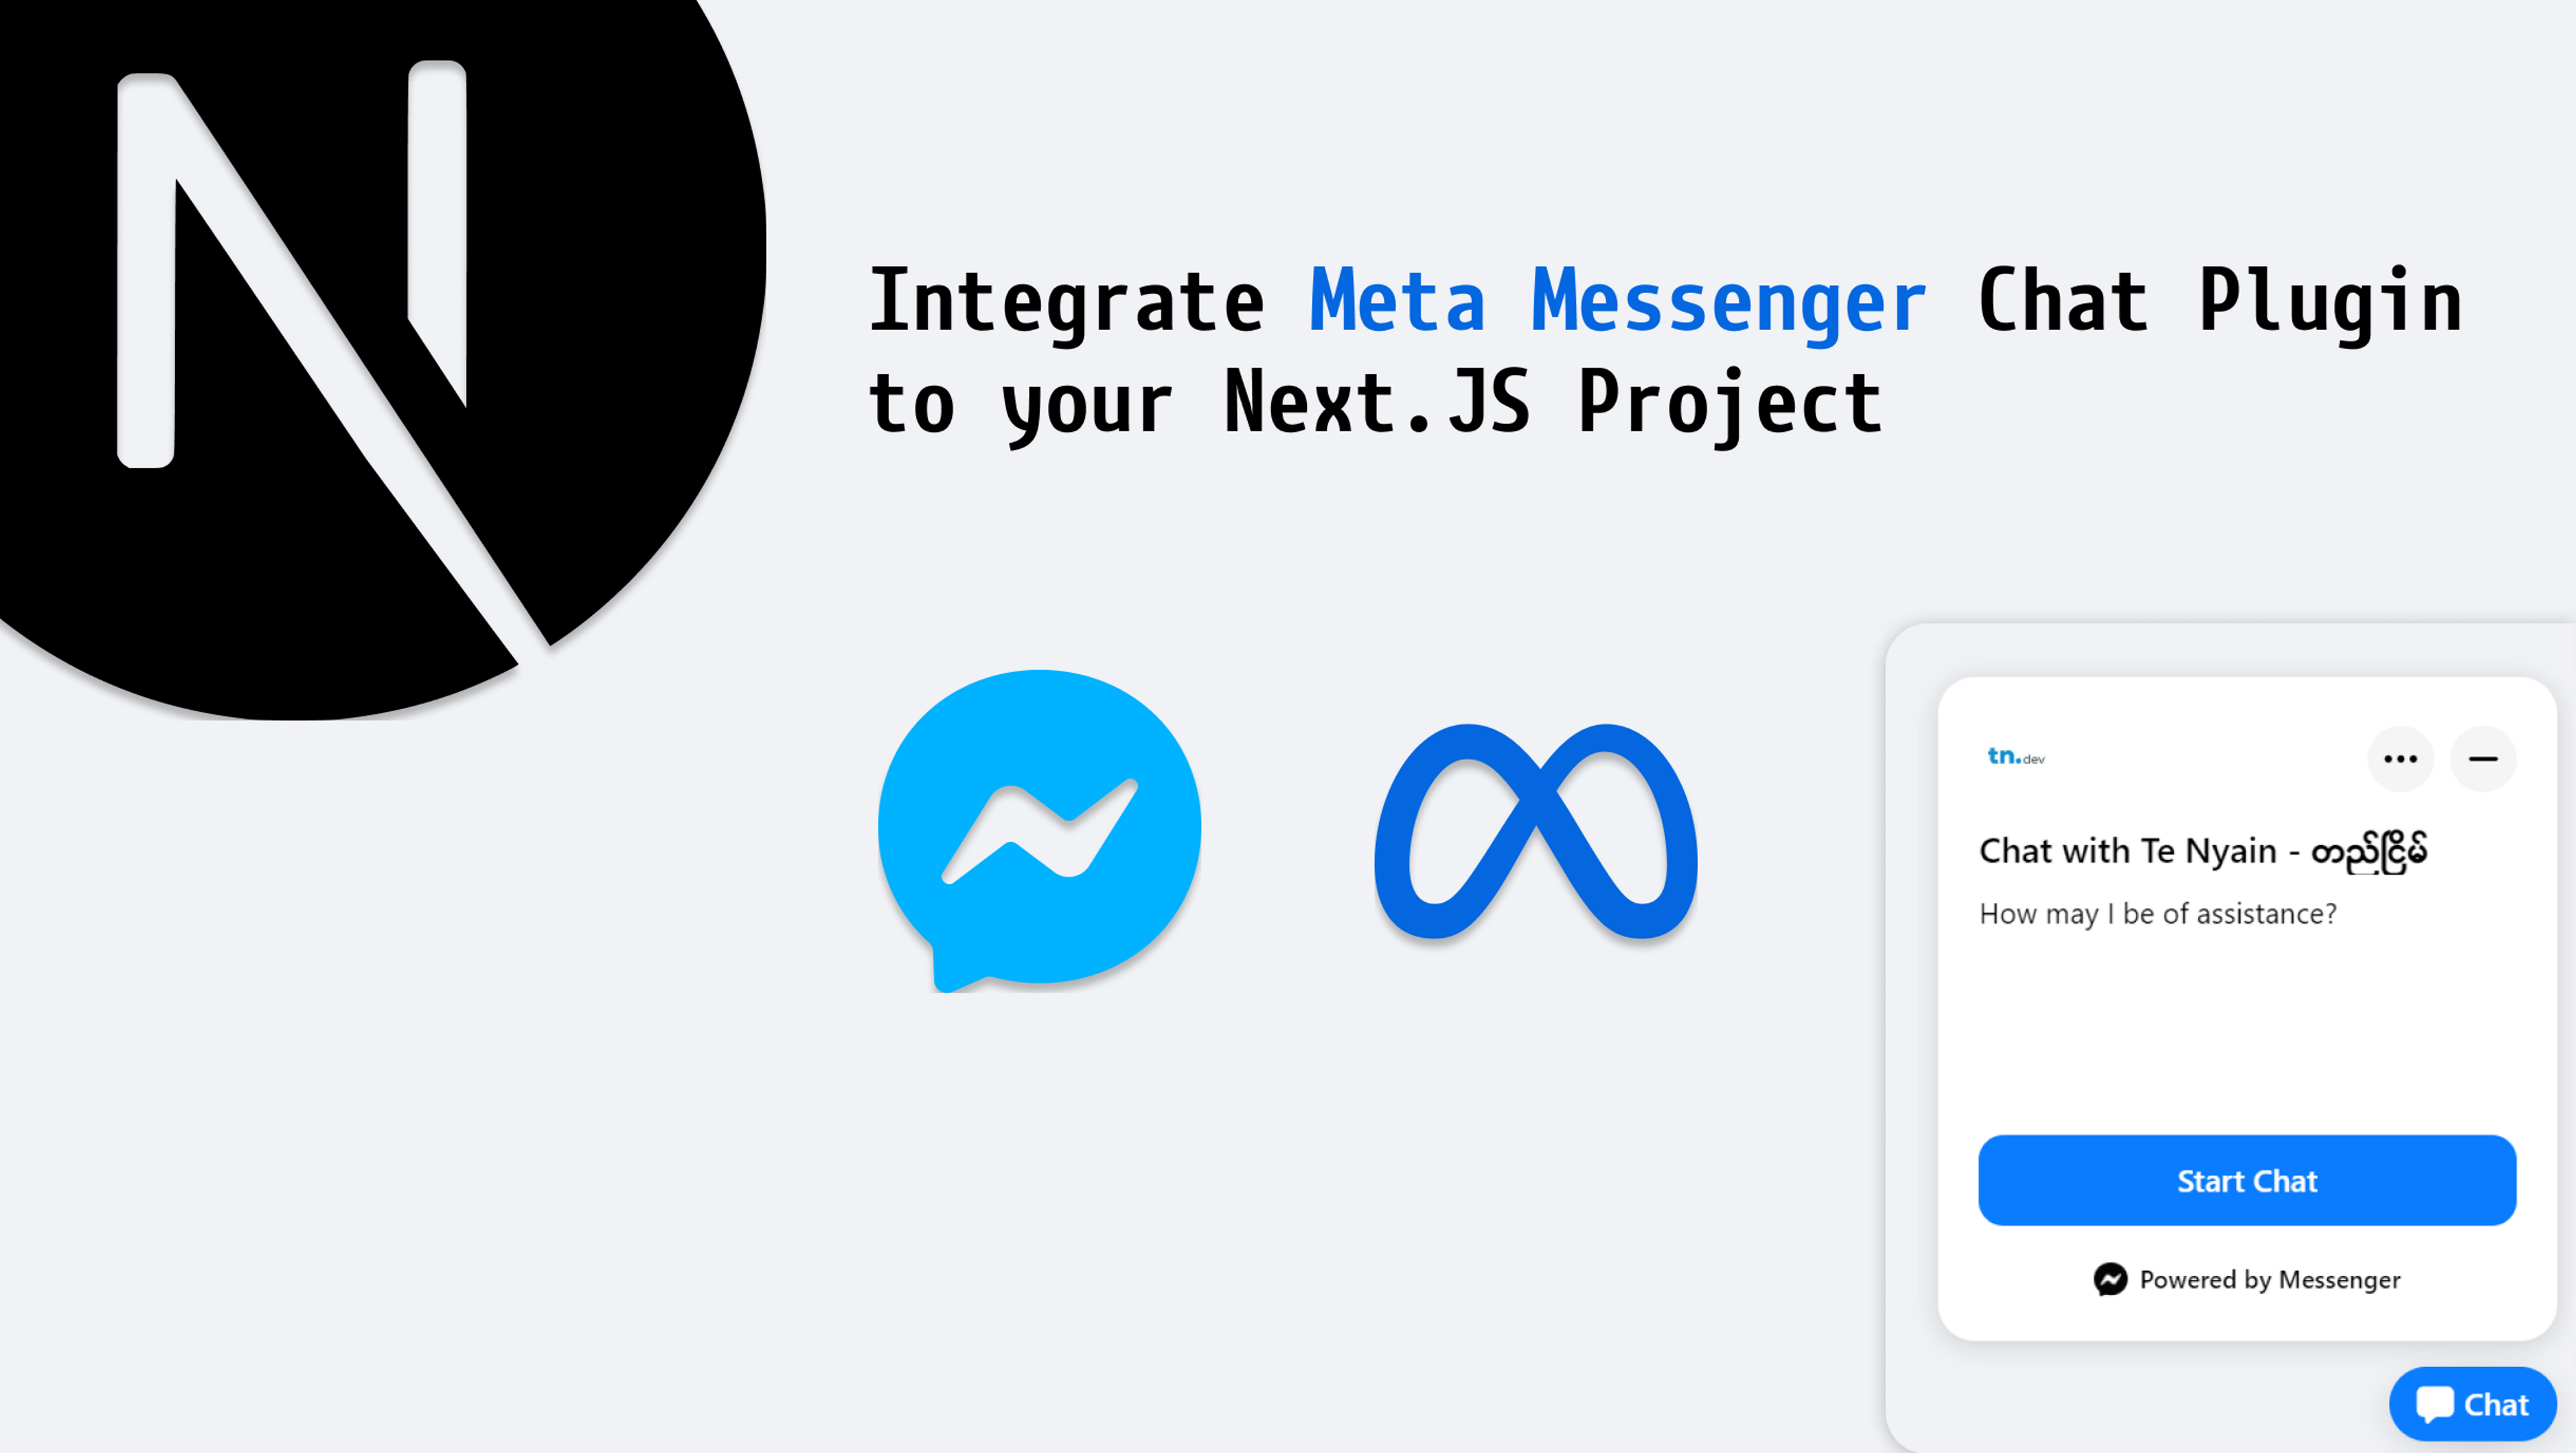
Meta Messenger Plugin in Next.JS 2023
Published on January 7th 2023
May 2024 Update : Chat Plugin is no longer availabe in 2024.
Meta announced the following;
1Chat Plugin is going away soon.
2
3On 9 May 2024, you will no longer be able to access any functionalities of
4Chat Plugin. Effective immediately, Chat Plugin in guest mode is no
5longer available. Other features such as m.me links will still be
6available for you to use.t.
In this article, we are going to set up Messenger chat plugin on our NextJS websites.
First of all, you must have your
- Facebook page
- Meta Business Suite
- Domain name with HTTPS
related to your personal or business system.
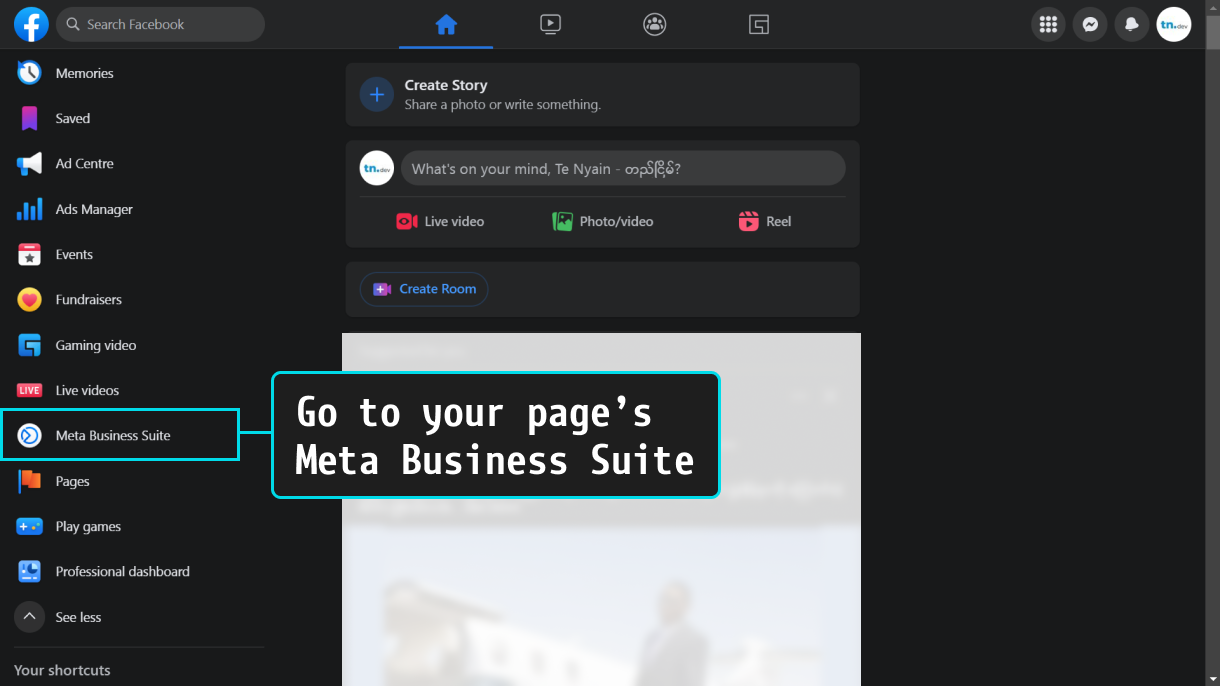
Step 1: Go to your page's Meta Business Suite
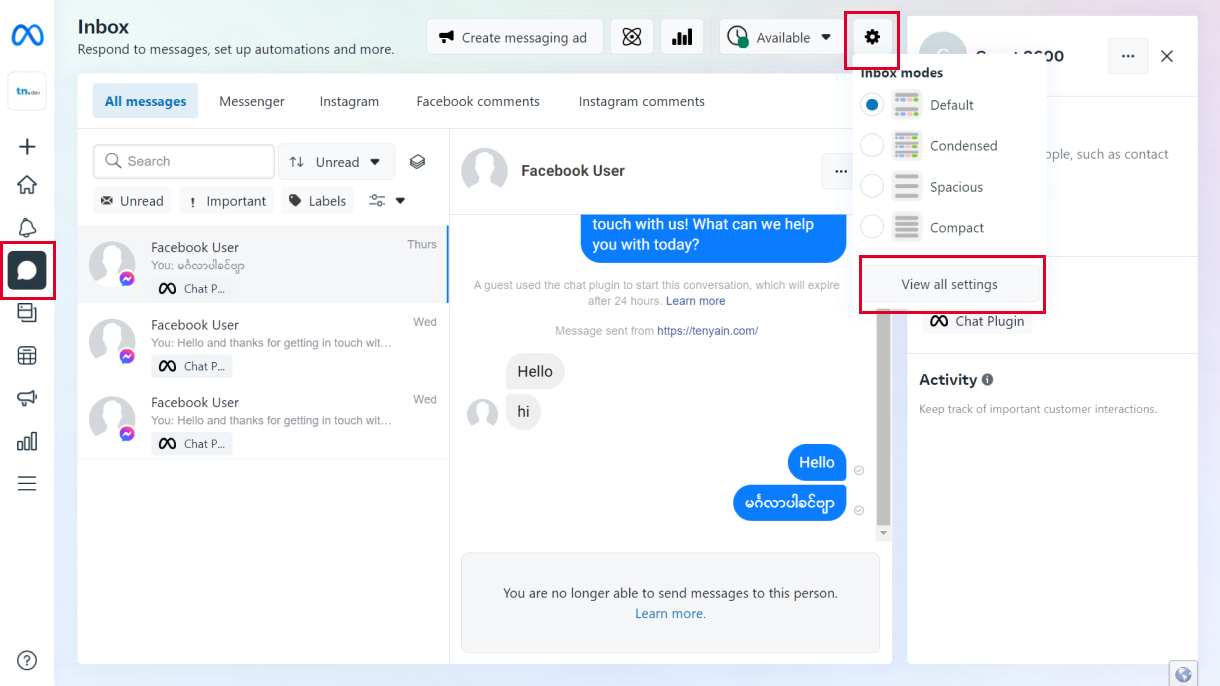
Step 2: Go to Inbox
- Click setting icon
- View all settings
Step 3: Chat plugin set up
In our Inbox > Inbox settings, we are going to prepare our plugin.
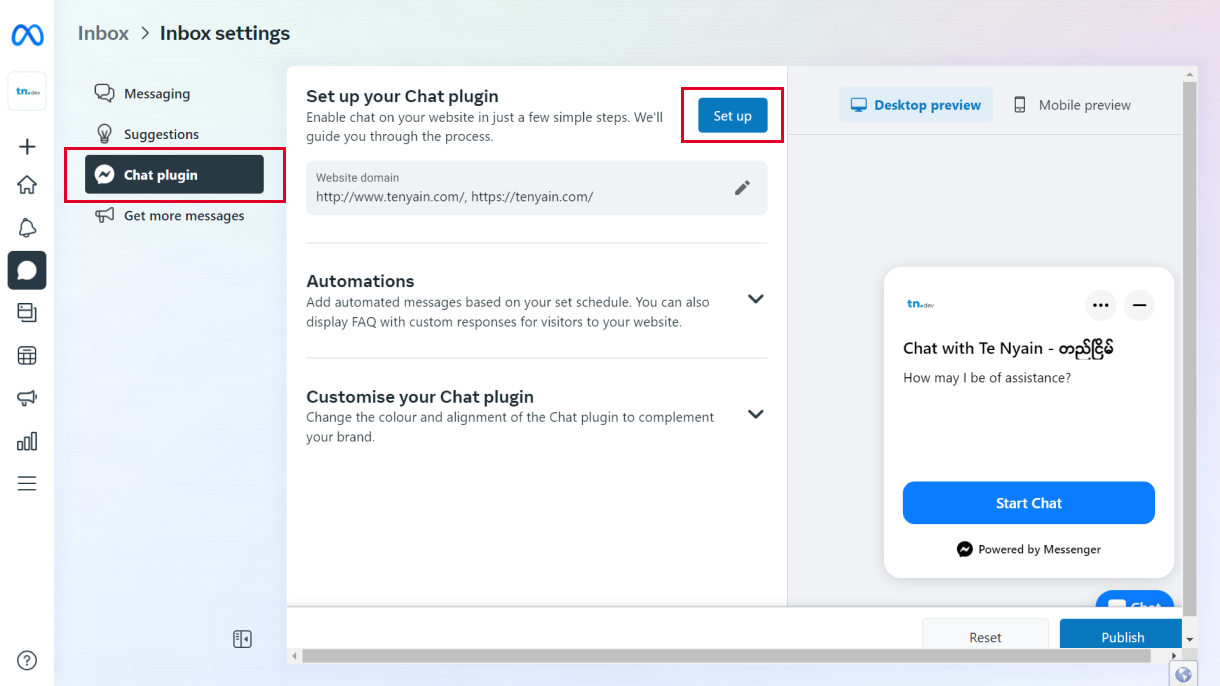
When you click the "Set up" button, a dialog box will pop up which is for choosing different web content platforms to set up our plugin code. We are using Next.JS so we are going to choose the "Standard" option.
After choosing that option, there will be 4 steps to set up the plugin.
- Set language: choose your preferred language
- Add domain: add your website URL where you want the chat plugin to pop up.
- Copy code: copy the code and paste it somewhere for now, we will go and add the copied code to your Next project in the next step.
- Paste code: click "Finish".
Step 4: Setting copied code in Next project
- Go to your
_document.js, if you haven't created one just create it. More about _document.js. - In
_document.js, place the code like in the following. You will see two script tags, first script tag withpage_idandattributionand second script tag isSDK code. Place the code which is within the script tags in the__htmlrespectively.
1import { Html, Head, Main, NextScript } from "next/document";
2import Script from "next/script";
3
4export default function Document() {
5  return (
6    <Html lang="en">
7      <Head>
8       /* Your code */
9      </Head>
10      <body>
11        {/* <!-- Messenger Chat plugin Code --> */}
12        <div id="fb-root"></div>
13
14        {/* <!-- Your Chat plugin code --> */}
15        <div id="fb-customer-chat" class="fb-customerchat"></div>
16        <Script
17          id="messenger-tag"
18          strategy="afterInteractive"
19          dangerouslySetInnerHTML={{
20            __html: `{Code within first script tag}`,
21          }}
22        ></Script>
23        <Script
24          id="messenger-sdk"
25          strategy="afterInteractive"
26          dangerouslySetInnerHTML={{
27            __html: `{Code within second script tag}`,
28          }}
29        ></Script>
30        <Main />
31        <NextScript />
32      </body>
33    </Html>
34  );
35}
Now your plugin code is set up and should pop up on your website. Please remember plugin will work only in your HTTPS domain which you added in Step:3 > 2, not in localhost and HTTP domain.
I hope you get your site working with the messenger plugin. Thank you.